3D INSPECTION SYSTEM - detailed quality control of paving blocks
◎ Precise control of product heights and surfaces
◎ Direct feedback for production optimization
◎ Less waste
◎ Cost reduction
The 3D inspection system is an extension of the SHV200 and SHV500 to the measuring system, which allows the quality control of all products on the production board in terms of both height and surface. The system is mounted on the wet side directly behind the block machine. 3D laser technology enables accurate quality analysis: the surface and height of the concrete blocks are analysed at the same time.
MEASURING METHOD:
R&W measuring systems analyse the height of the production board and the height of the concrete block.
The 3D sensor, in combination with 3-point lasers, can measure the height of all products on the production pallet.
The 3D system also uses the relative height between the top edge of the board and the top edge of the stone to measure the height. This measuring principle makes the 3D Inspection system independent of the changing dimensions and quality of production pallets.
DETECTION OF PRODUCT SURFACE DEFECTS:
The device displays product heights with a resolution of 0.1 mm. The measurement accuracy is +/- 0.5 mm.
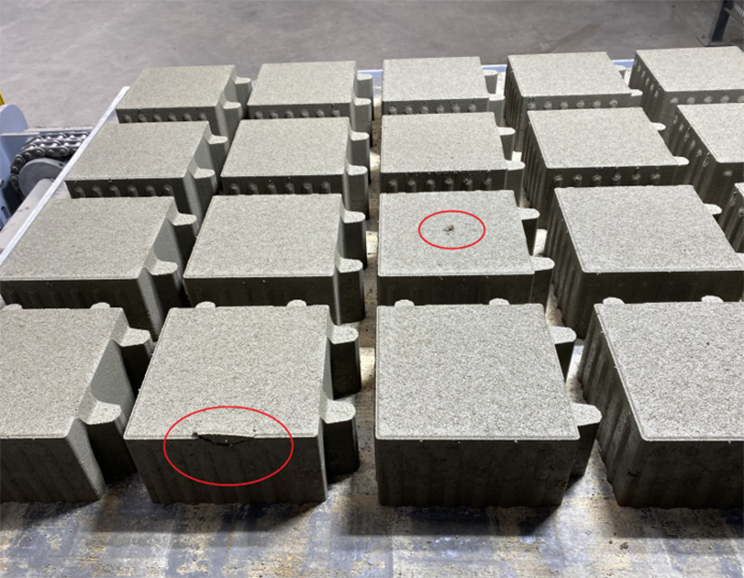
In addition to height measurement, the 3D sensor can analyze the surface of stones for defects. This is made possible by a special 3D camera and a bright laser line. This enables the sensor to accurately inspect even dark-coloured concrete products.
Optionally, the system can be equipped with an additional high-resolution 2D camera with illumination to detect small cracks and spots in the texture of the blocks.
BENEFITS:
◎ accurate height measurement of all products on the production plate
◎ detailed inspection of blocks for irregularities such as bulges, cracks, cavities, etc.
◎ possibility of extending existing height measuring systems from R&W (SHV200 / SHV500)
◎ measurement of freshly manufactured concrete products on the production boards in circulation in the height range 20-490 mm
◎ early detection of defects
◎ reduction of waste
◎ data acquisition and analysis

Recording and evaluation of defects with SHV-VISU software
In addition to the 3D Inspection System, R&W also offers software that provides the user with convenient handling, efficient data storage and simple analysis.
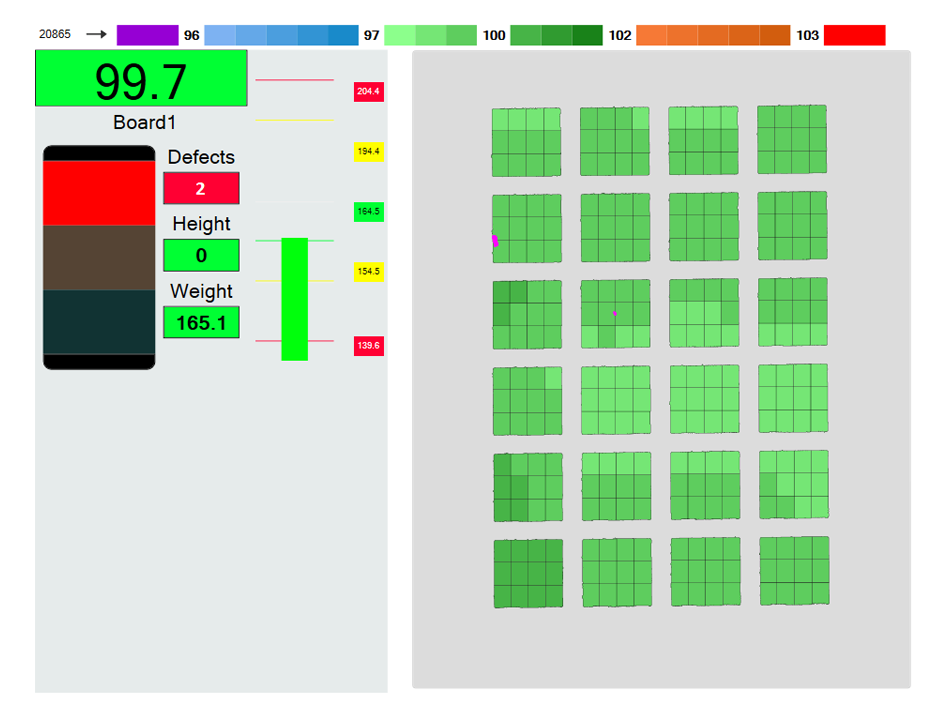
The operator of the block machine is provided with an actual view of the manufactured products in a colour visualisation enabling the user to easily recognise the course of the height of the products on the production plate. At the same time, surface defects are displayed. The measurement system can thus be used as a reliable tool for optimising production line settings.
In addition, the system allows statistical analyses and exporting of measurement values. Statistical data analysis in the SHV-Visu 3D software provides quick and uncomplicated options for identifying "Hot-Spots" errors. Customer-friendly interfaces provide helpful data for analysis or for optimizing machine settings.
Connection to the control system of the production machine is also possible. The software can also be installed on additional computers (e.g. in the quality control office).

